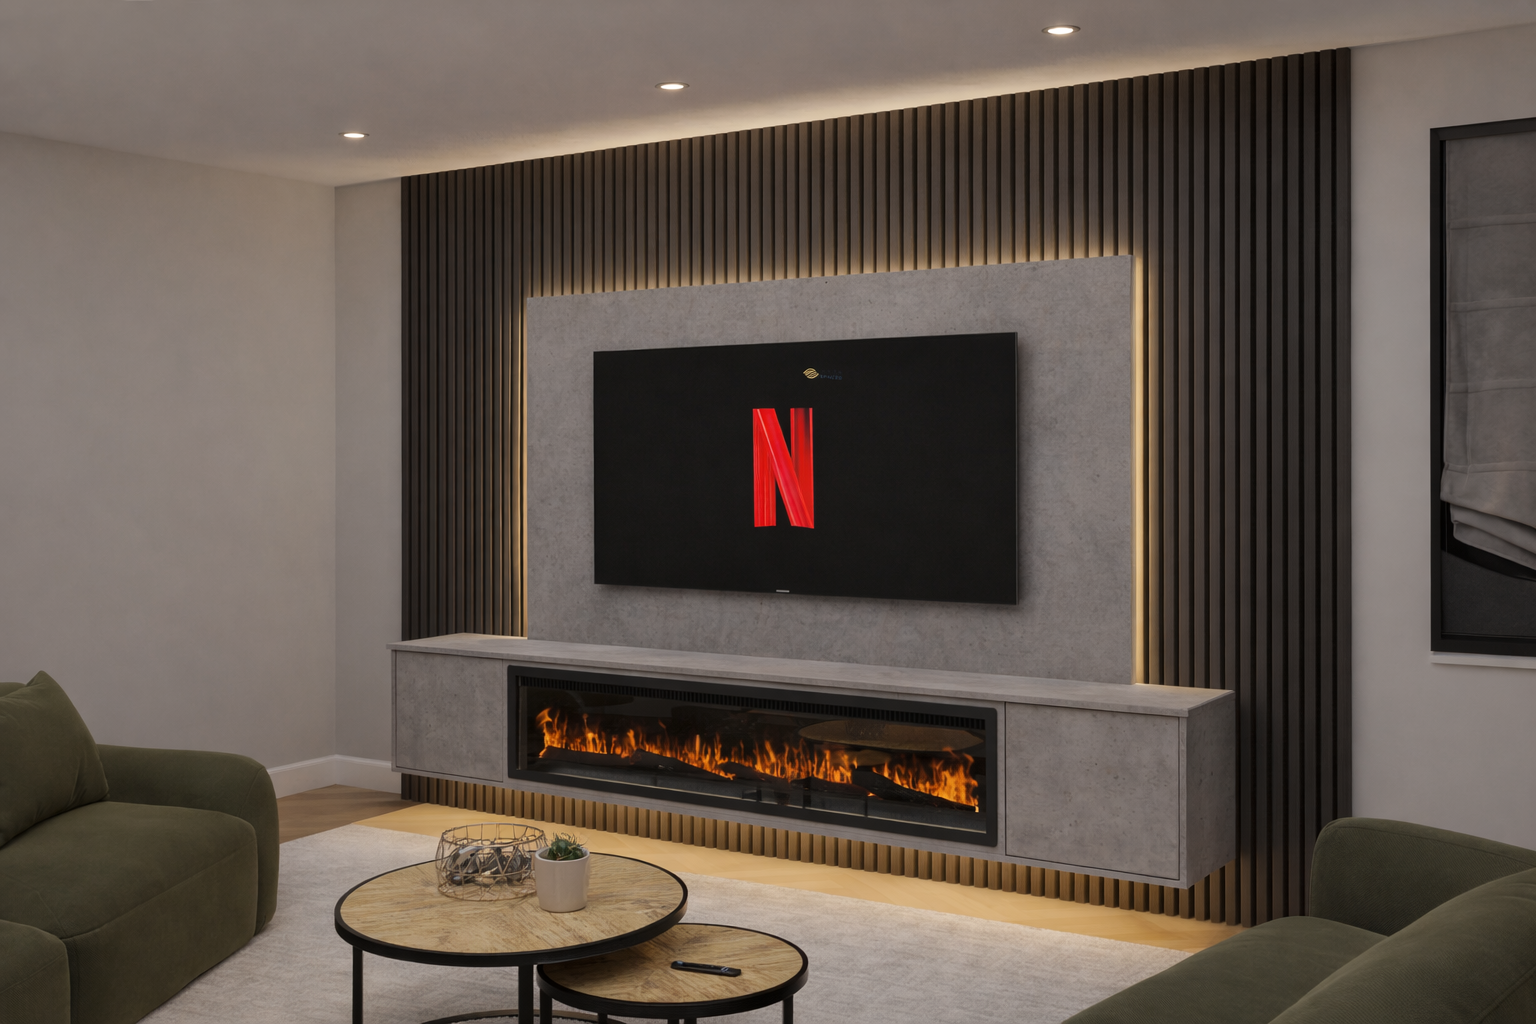
A media wall is a one-day job. If your electrics are already in, a joiner will have the whole thing up in three to four hours. Doing it yourself, including building the flat-pack unit and working out the sequence as you go, allow a day.
You'll want a second pair of hands for the lifting. The floating unit is 40–50kg on its own, and up to 70kg with a fire in it.
Watch it first
One note: we've changed the split batten since this was filmed, so where the video and the written steps below differ, follow the written steps. A new video is on its way.
Would you rather someone else did it?
Most of our customers use a local joiner. As a guide, fitting starts from £500, depending on how much is involved — sockets, HDMI and Sky cable runs, whether the wall needs framing out, and whether it's brick. Give us a call on 0141 345 2962 or email sales@visionspaces.co.uk and we'll talk you through what your job is likely to cost.
Before you start: the electrics
We don't give electrical advice — that's a job for a qualified electrician. What we can do is tell them exactly where things need to go. Hand them these measurements before they start, because moving a socket after the wall is up means taking the wall down.
- Behind the TV — central to the TV panel, 400mm down from the top. It ends up behind the screen and never sees daylight.
- Inside the cabinet — below the half-back, in the lower part of the internal space.
The fire needs nothing special. No recess, no hearth, no dedicated spur. The cabinet comes with the opening already cut and the fire runs off a normal 13A socket — it simply plugs in.
HDMI cables. Decide now what's going into the wall and have the cables ready on the day. We'd suggest 5-metre lengths so you have slack to route them properly. Once the panels are on, adding a cable means taking something off the wall.
The measurements that matter
| Floor to the bottom of the floating unit | 250mm |
| Height of the floating unit | 418mm |
| Gap between the top of the unit and the bottom of the TV panel | 70mm |
| Height of the TV panel | around 1200mm, depending on your TV and panel size |
| Ceiling to the top of the TV panel | whatever's left over |
| Panel showing around the edge of the TV | 200–250mm |
| Socket behind the TV | central, 400mm from the top of the panel |
What you'll need
- A circular saw or jigsaw, for cutting the slat panels to length
- A jigsaw, for the socket cut-out in the TV panel
- A drill — an impact drill is best
- A tape measure and a spirit level
- A screwdriver
- A hammer, for the dowels when you build the unit
- Masking tape, and a spare batten to rest the TV panel on
Fixings for a standard plasterboard or brick wall come in our £80 installation kit — LED strips, TV bracket, grab adhesive, drywall screws and 120mm screws. On a standard wall that's everything except the rawl plugs.
Which wall have you got?
Every wall type works. The only thing that changes is the fixing.
| Plasterboard on studs — most homes | Black drywall screws into the studs behind. Adhesive optional. |
| Solid brick or a chimney breast | Adhesive on its own will hold, but we'd add a couple of drywall screws with rawl plugs. Easiest of the lot — you can fix anywhere. |
| Dot-and-dab | Drywall screws, adhesive optional. Screwfix carry dot-and-dab specific fixings if you want the belt and braces. |
Step 1 — Mark out your studs
This is the most important step in the whole job. Get it right and everything after it is easy. Skip it and you're guessing where to put the fixings holding 70kg of cabinet on your wall.
Run a length of masking tape along the wall at working height and mark every stud position onto the tape. Marking the tape rather than the wall or the skirting means you peel it off at the end and leave no trace.
On solid brick or a chimney breast you can skip this — you can fix anywhere.
Step 2 — Cut and fit the slat panels
Measure and cut the panels down with a circular saw or a jigsaw. You don't need to finish the cut edges — we'd recommend you don't. A cut edge sits better against the next panel than a finished one.
Step 3 — Build the floating unit
The unit arrives flat-packed and builds in 25–30 minutes. Everything you need is in the box along with written instructions. Build it on the floor, near where it's going.
Step 4 — Hang the unit on the French cleat
The unit hangs on a French cleat — a length of timber ripped down its length at an angle so the two halves hook into each other. One half goes on the wall, the other is on the back of the unit.
- Fix the wall half of the cleat, dead level, at the height that puts the bottom of the unit 250mm off the floor. Screw it securely into your studs — or anywhere, on brick.
- With two people, lift the unit and hook it onto the cleat.
- From inside the cabinet, drive long screws through the back into the wall.
That last step isn't optional. The cleat sets the position; the screws carry the weight. With a fire in it you're hanging up to 70kg on that wall.
Step 5 — Fit the TV panel
- Fix two lengths of CLS timber to the wall, into the studs — one near the top of where the panel will sit, one near the bottom.
- Lay a spare batten across the top of the floating unit. That gives you the 70mm gap for free and takes the weight while you line things up.
- Rest the TV panel on the batten and screw it back into the CLS.
- Take the batten out.
If a socket sits behind the panel, cut that hole with the jigsaw before you fix the panel to the wall.
Step 6 — Bracket, LEDs, done
Mount your TV bracket to the panel, fit your LED strips, hang the TV, peel off your masking tape. That's the job.
Still stuck?
Call us Monday to Friday, 8:00am–4:30pm on 0141 345 2962, or email sales@visionspaces.co.uk any time and we'll come back to you within 24 hours.